This project would not have felt complete without a bit of bling! The fashion plate I was re-creating showed the figure wearing a chatelaine, bracelet and necklace with gold colour schemes.

I decided to begin with the chatelaine, These were adapted from the key chains that were traditionally worn by the lady of a house and often included sewing kits, watches and other useful items.
 |
| This Chatelaine is from the MFA in Boston |
 |
| A beaded chatelaine also from the MFA |
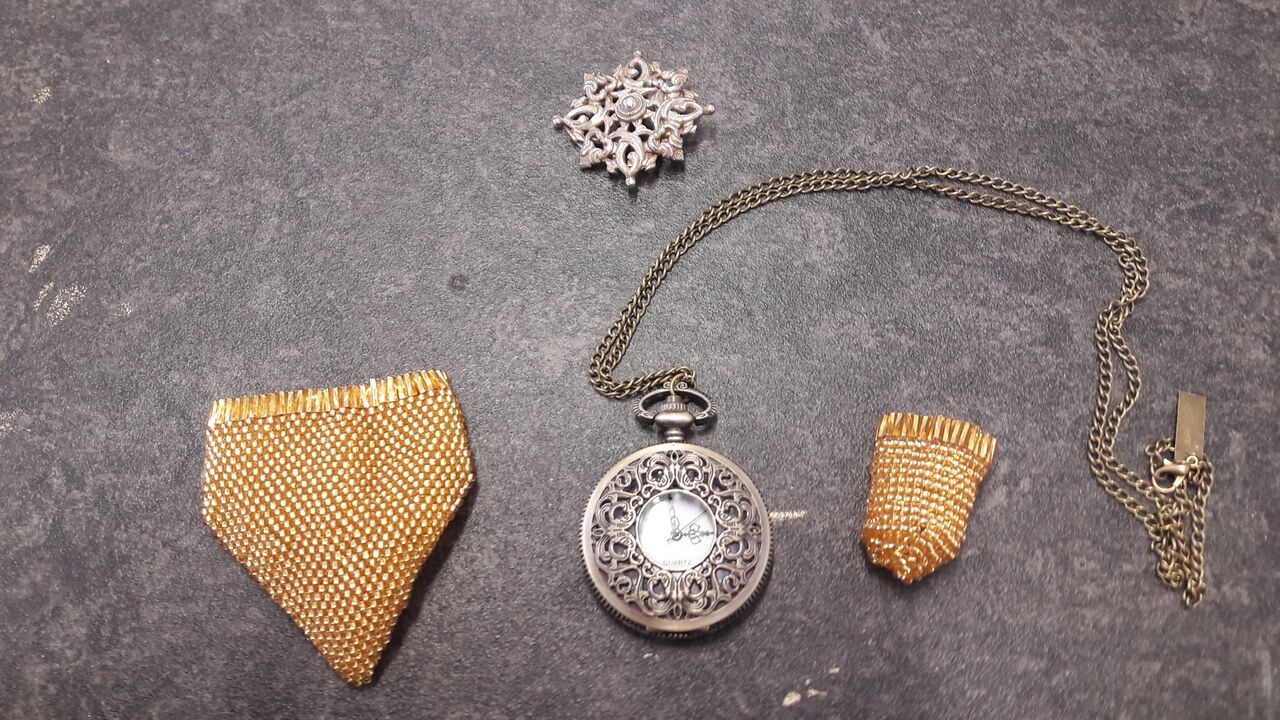
All of the elements were then fastened together with jump rings.

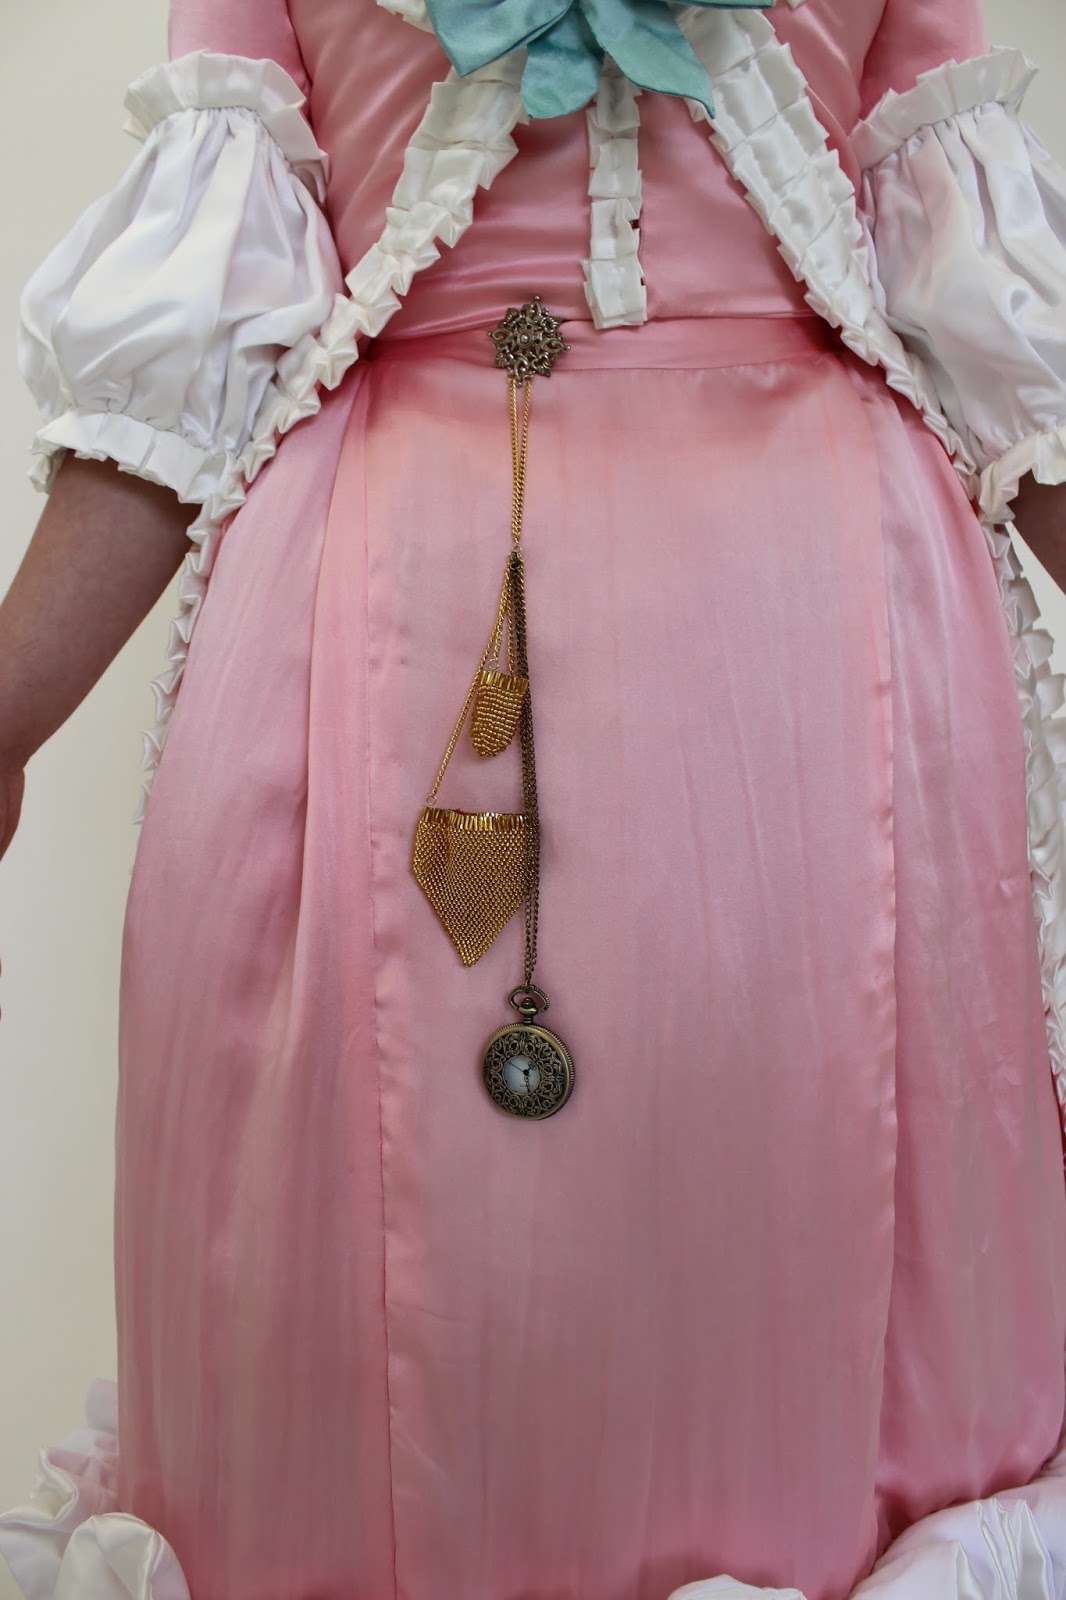
I was so proud of it I got two Photos.
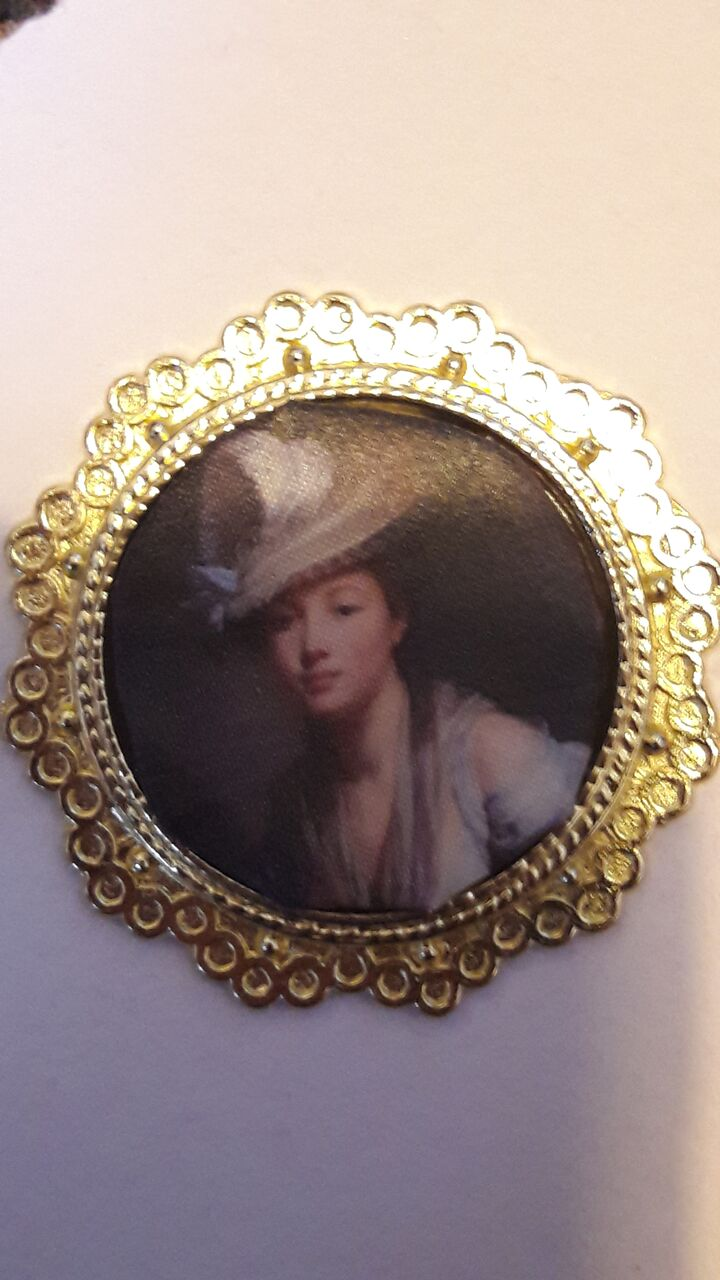
Then onto the necklace and bracelet. Which I was also proud of despite having almost no photos of any off the making process, let alone close-ups off the final things.
For these pieces I was going for these (below) sort of looks with the portraits.
 |
| Add caption |


I began with the bracelet and went searching for a fitting online, after a few hours of searching I gave up finding one I liked that was the right size and decided to order a doll's house mirror instead (bear with me I swear I hadn't gone crazy)...
To make the image for thee bracelet I heat transferred a portrait onto a scrap of white silk. (I'm pretty sure that both portraits I used were of unknown sitters but I don't seem to have noted the name of the
artist/s down anywhere if anyone can help.)
The silk was then cut into a circle slightly larger than a backing piece of card and gathered around it.

The portrait was glued over the glass of the mirror and gold coloured ribbon glued onto the back.

The necklace was a similar process (except I actually bought a fitting this time) Unfortunately the only photo I appear to have of it is of the finished thing.

That's all for this time, next up...(drum roll please)... it's The Gown! The next post will probably be a very long one (I'm tempted to split it into several parts) but you actually get to see how the amazing marshmallow Polonaise was created! Yay!


No comments:
Post a Comment